Who is online?
In total there are 9 users online :: 0 Registered, 0 Hidden and 9 Guests None
Most users ever online was 112 on 8th October 2020, 7:09 am
Latest topics
» Champion the Lumber Horseby Chilli-head 18th August 2024, 6:24 pm
» Hungry Birds
by Dirick55 7th December 2023, 6:04 am
» PRESENTATION
by Chilli-head 23rd November 2023, 2:55 pm
» New Kiva loan
by Chilli-head 21st July 2023, 12:35 pm
» A peat-free compost is top in UK Which? magazine trial
by Dandelion 25th April 2023, 9:42 pm
» New gardening year 2023
by Chilli-head 5th March 2023, 10:15 pm
» What have I done in the workshop today?
by Dandelion 2nd December 2022, 1:12 pm
» What are you harvesting today?
by Dandelion 2nd December 2022, 1:12 pm
» Wartime marrow casserole
by Dandelion 18th October 2022, 4:42 pm
» Late sowings in August ... beans ?
by Ploshkin 11th August 2022, 9:29 am
» Come August, come night in the garden
by Chilli-head 4th August 2022, 3:29 pm
» Welcome guest
by Ploshkin 31st July 2022, 9:16 am
» The Jolly July Garden
by Ploshkin 19th July 2022, 11:38 am
» More mead ...
by Chilli-head 13th July 2022, 12:52 pm
» The June garden thread
by Dandelion 25th June 2022, 9:55 pm
» Plastic bags
by Dandelion 5th June 2022, 7:28 pm
» The merry May garden
by Dandelion 31st May 2022, 10:04 pm
» Fooling around in the April garden
by freebird 1st May 2022, 8:33 am
» March into the garden
by Dandelion 1st April 2022, 7:26 pm
» Mow Suggestions
by freebird 29th March 2022, 5:48 pm
Statistics
We have 271 registered usersThe newest registered user is Phil Morris
Our users have posted a total of 48047 messages in 2416 subjects
Similar topics
Growing potatoes and Jerusalem artichokes
2 posters
Page 1 of 1
 Growing potatoes and Jerusalem artichokes
Here is a link to a post on my blog about growing potatoes and artichokes in 2009, with more info and pictures
Main details, below, with updates from how it all went.
Growing Potatoes and Jerusalem artichokes
 Potatoes
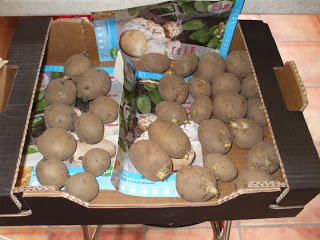
To avoid introducing pests and diseases into your crop, buy good quality, certified seed potatoes and start 'chitting' them as early as possible. This process encourages the tubers to produce strong, sturdy sprouts and gives an earlier maturing crop.
This is what you do:
Store the seed tubers in a light, cool (10°C), frost free spot and leave them to sprout. This is known as chitting. Place the tubers rose end up (the end where the tiny buds can be seen), in a clean box or tray. An egg box would be ideal, or a fruit tray from a supermarket ( the thick card ones are good!)
If you have more than one variety, label the box ( :-) )
Keep in a cool dark place.
When you see tiny shoots appearing move the tubers to a cool (8-10°C), light place.
Potatoes in the ground.
Dig in well-rotted manure or garden compost (apply no more than one wheelbarrow-full of well-rotted strawy manure, or two of compost, per 10 sq metres of ground) Plant tubers into trenches or in individual holes, 7-15cm in depth, cover with soil. See spacings below:
I make a shallow trench and then dig a hole for each tuber in the trench, this gives me soil to earth up the growing plants as required.
I use a shovel of my home made compost in each of the holes with a tuber in, plus a scoop of wood ash and a scoop of organic "Rooster" chicken manure (available from the Organic Gardening Catalogue).
1st early – 28-36cm apart, 38-50cm between rows.
2nd early & maincrop – 36-45cm apart, 65-75cm between rows.
Potato planting can start from mid March in milder areas, where frost is rare. If the soil is slow to warm, wait until April or May, or protect early plantings with fleece or cloches.
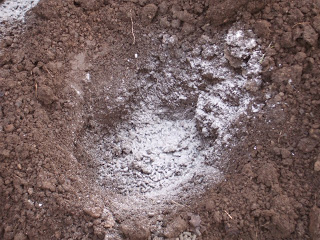


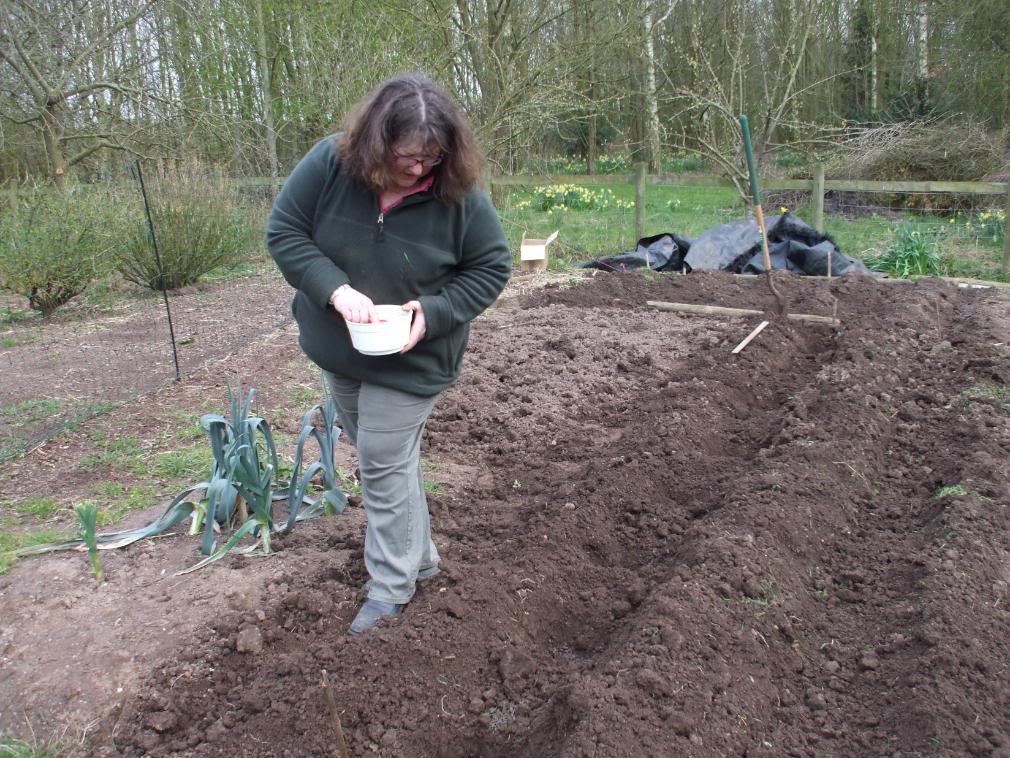
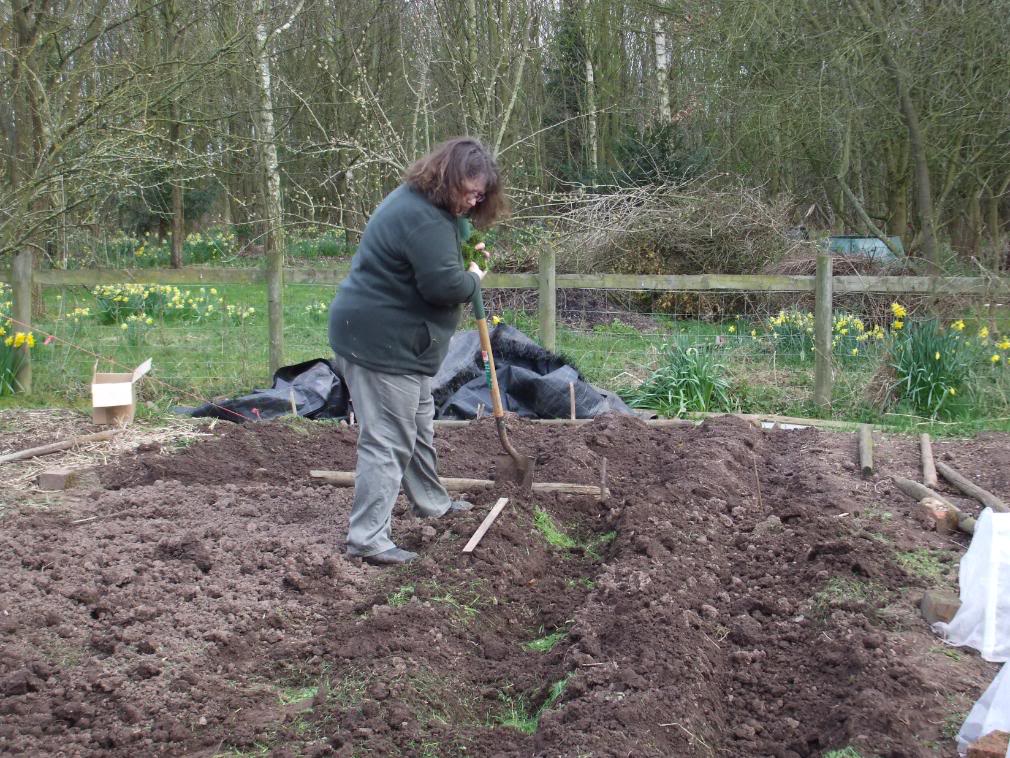
Compostman dug over the ground for me and then I made some trenches and dropped each spud in a hole in the bottom of the trench, with some organic chicken poo pellets, wood ash and some grass clippings (they help prevent scab)
I then tucked the spuds up nice and warm with a good covering of soil....
Every year we grow enough spuds to last us from late June/early July until the following May... so we only buy potatos for about a month or so every year.
But in 2007 we lost virtually all our Maincrop harvest to blight (oh what a suprise, after all the wet weather we had!)
2008 was a bit better, because we had good weather in Feb and March I got the earlies and 2nd Earlies in, well..... early ;-)
so when the blight hit again, we had a good crop to harvest, which stored well.
In 2009 I spaced out the rows a little more, AND left a larger gap between each spud within the trench, so hopefully more air got in between the potato plants.
d) I did not growing maincrop varieties which need a longer growing season to mature and so are worst affected by blight.
As a result we had a decent harvest and are still eating out own spuds.
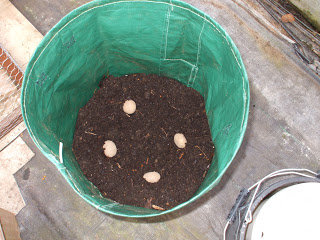
Potatoes in grow sacks.
But what do you do if you don't have space in the ground?
You grow spuds in bags or pots, thats what!
To get an earlier crop I planted these in Feb on a waning moon. If you have a sheltered place you will get an earlier crop by doing this, up to 4 weeks earlier. Mmmmm new potatoes and butter
They were nice, and we ate some about a month earlier than outdoor ones...but the yield was poor.

Jerusalem Artichokes
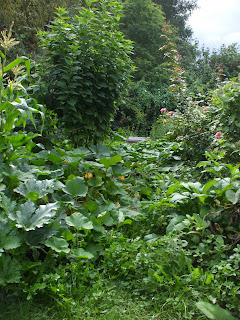
They are grown in the same spot each year, for if you miss a tuber it will grow like a volunteer potato, so prepare the ground well with plenty of manure which you can top up as a mulch in winter. Be careful where you site them, the foliage easily reaches 2 metres and 2.4 metres is common. The stems are quite delicate and you will need to provide support with stakes and string in windy locations.
Plant individual tubers about 40 to 60cm (15" to 24") apart around 12cm (4" to 6") deep in early spring and in a few weeks the shoots will appear. If you have more than one row, allow 75cm (30") between rows. When they reach about 30cm (12") high, earth up a little as for potatoes.
They are quite a productive crop, 3kg from one plant is typical so you don't need many seed tubers.
Main details, below, with updates from how it all went.
Growing Potatoes and Jerusalem artichokes
To avoid introducing pests and diseases into your crop, buy good quality, certified seed potatoes and start 'chitting' them as early as possible. This process encourages the tubers to produce strong, sturdy sprouts and gives an earlier maturing crop.
This is what you do:
Store the seed tubers in a light, cool (10°C), frost free spot and leave them to sprout. This is known as chitting. Place the tubers rose end up (the end where the tiny buds can be seen), in a clean box or tray. An egg box would be ideal, or a fruit tray from a supermarket ( the thick card ones are good!)
If you have more than one variety, label the box ( :-) )
Keep in a cool dark place.
When you see tiny shoots appearing move the tubers to a cool (8-10°C), light place.
Potatoes in the ground.
Dig in well-rotted manure or garden compost (apply no more than one wheelbarrow-full of well-rotted strawy manure, or two of compost, per 10 sq metres of ground) Plant tubers into trenches or in individual holes, 7-15cm in depth, cover with soil. See spacings below:
I make a shallow trench and then dig a hole for each tuber in the trench, this gives me soil to earth up the growing plants as required.
I use a shovel of my home made compost in each of the holes with a tuber in, plus a scoop of wood ash and a scoop of organic "Rooster" chicken manure (available from the Organic Gardening Catalogue).
1st early – 28-36cm apart, 38-50cm between rows.
2nd early & maincrop – 36-45cm apart, 65-75cm between rows.
Potato planting can start from mid March in milder areas, where frost is rare. If the soil is slow to warm, wait until April or May, or protect early plantings with fleece or cloches.


Compostman dug over the ground for me and then I made some trenches and dropped each spud in a hole in the bottom of the trench, with some organic chicken poo pellets, wood ash and some grass clippings (they help prevent scab)
I then tucked the spuds up nice and warm with a good covering of soil....
Every year we grow enough spuds to last us from late June/early July until the following May... so we only buy potatos for about a month or so every year.
But in 2007 we lost virtually all our Maincrop harvest to blight (oh what a suprise, after all the wet weather we had!)
2008 was a bit better, because we had good weather in Feb and March I got the earlies and 2nd Earlies in, well..... early ;-)
so when the blight hit again, we had a good crop to harvest, which stored well.
In 2009 I spaced out the rows a little more, AND left a larger gap between each spud within the trench, so hopefully more air got in between the potato plants.
d) I did not growing maincrop varieties which need a longer growing season to mature and so are worst affected by blight.
As a result we had a decent harvest and are still eating out own spuds.
Potatoes in grow sacks.
But what do you do if you don't have space in the ground?
You grow spuds in bags or pots, thats what!
To get an earlier crop I planted these in Feb on a waning moon. If you have a sheltered place you will get an earlier crop by doing this, up to 4 weeks earlier. Mmmmm new potatoes and butter
They were nice, and we ate some about a month earlier than outdoor ones...but the yield was poor.
Jerusalem Artichokes
They are grown in the same spot each year, for if you miss a tuber it will grow like a volunteer potato, so prepare the ground well with plenty of manure which you can top up as a mulch in winter. Be careful where you site them, the foliage easily reaches 2 metres and 2.4 metres is common. The stems are quite delicate and you will need to provide support with stakes and string in windy locations.
Plant individual tubers about 40 to 60cm (15" to 24") apart around 12cm (4" to 6") deep in early spring and in a few weeks the shoots will appear. If you have more than one row, allow 75cm (30") between rows. When they reach about 30cm (12") high, earth up a little as for potatoes.
They are quite a productive crop, 3kg from one plant is typical so you don't need many seed tubers.
Last edited by Compostwoman on 21st February 2010, 3:13 pm; edited 2 times in total

Compostwoman- Posts : 5688
Join date : 2009-11-08
 Re: Growing potatoes and Jerusalem artichokes
Any advice on how to rid soil of Jerusalem artichokes after the damn things have established, or is the plot spoiled forever by the accursed tubers?
 Re: Growing potatoes and Jerusalem artichokes
Mmmm I have that same problem Billy.
To try to get rid, I have dug over the raised bed where they grow and got out all the volunteer JA's left behind...as that is what causes the fresh growth. So, in theory, I shouldn't have any new ones...BUT I am taking no chances...
I am moving the raised bed where the JA's have been growing, so the Mega Hen Pen can be constructed over it.!
So far, I have found hens the most efficient method of eradicating ANYTHING growing....
It also depends on how defined an area they have been growing in...if you can't dig out all the tubers could you put down a light excluding mulch to smother them?

Compostwoman- Posts : 5688
Join date : 2009-11-08
Page 1 of 1
Permissions in this forum:
You cannot reply to topics in this forum

